Vagrant & VirtualBoxでCentOS7の仮想マシンを作成する
VagrantでCentOS7の仮想マシンを作成する
Vagrant & VirtualBoxを利用して、CentOS7の仮想マシンを構築する手順をメモ。
VagrantとVirtualBoxを使用したローカル開発環境の基本的な構築手順は下記の記事でも詳しく解説しています。
VagrantとVirtualBoxで仮想環境を構築する① 準備編
VagrantとVirtualBoxで仮想環境を構築する② 初期化&起動編
CentOS7のBOXを入手する

仮想マシンを作成するためのCentOS7の専用イメージをVagrant公式サイトよりダウンロードします。
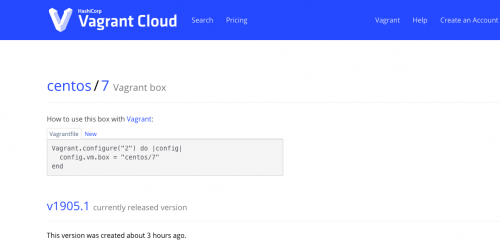
Vagrant Cloudサイト、CentOS7のboxページより

ページに表示されている内容が少し分かりづらかったのですが、”centos/7″ の部分を抜粋して、
vagrant box add コマンドで実行すればOKです。
vagrant box add centos/7
(virtualboxを利用しているので、3を選択)
$ vagrant box add centos/7
==> box: Loading metadata for box 'centos/7'
    box: URL: https://vagrantcloud.com/centos/7
This box can work with multiple providers! The providers that it
can work with are listed below. Please review the list and choose
the provider you will be working with.

1) hyperv
2) libvirt
3) virtualbox
4) vmware_desktop

Enter your choice: 3
==> box: Adding box 'centos/7' (v1905.1) for provider: virtualbox
    box: Downloading: https://vagrantcloud.com/centos/boxes/7/versions/1905.1/providers/virtualbox.box
    box: Download redirected to host: cloud.centos.org
==> box: Successfully added box 'centos/7' (v1905.1) for 'virtualbox'!
追加したBOXを確認する方法
vagrant box list コマンドを実行
(centos/7 の追加に成功している)
$ vagrant box list
centos/7            (virtualbox, 1905.1)
hashicorp/precise64 (virtualbox, 1.1.0)
mycentos6           (virtualbox, 0)
または、ホーム配下の不可視ディレクトリ.vagrant.d/boxes内を参照する
$ ls .vagrant.d/boxes
centos-VAGRANTSLASH-7			hashicorp-VAGRANTSLASH-precise64	mycentos6
仮想マシンを初期化して起動する
追加したBOXから仮想マシンを起動するためのディレクトリを別途作成します。
(LAMP環境にしたいのでcentos7_lampというディレクトリ名にしている)
$ mkdir vagrant_machines/centos7_lamp
作成したディレクトリへ移動して、
コマンド vagrant init でマシンの初期化を行います。
vagrant init centos/7
ディレクトリ内にVagrantfileという設定ファイルが作成されます。
$ vagrant init centos/7
A `Vagrantfile` has been placed in this directory. You are now
ready to `vagrant up` your first virtual environment! Please read
the comments in the Vagrantfile as well as documentation on
`vagrantup.com` for more information on using Vagrant.
設定ファイルのあるディレクトリのまま、コマンド vagrant up を実行し、初期化した仮想マシンを起動します。
KENnoMacBook-ea:centos7_lamp ken$ vagrant up
Bringing machine 'default' up with 'virtualbox' provider...
==> default: Importing base box 'centos/7'...
==> default: Matching MAC address for NAT networking...
==> default: Checking if box 'centos/7' is up to date...
==> default: Setting the name of the VM: centos7_lamp_default_1562493687656_54049
==> default: Fixed port collision for 22 => 2222. Now on port 2200.
==> default: Clearing any previously set network interfaces...
==> default: Preparing network interfaces based on configuration...
    default: Adapter 1: nat
==> default: Forwarding ports...
    default: 22 (guest) => 2200 (host) (adapter 1)
==> default: Booting VM...
==> default: Waiting for machine to boot. This may take a few minutes...
    default: SSH address: 127.0.0.1:2200
    default: SSH username: vagrant
    default: SSH auth method: private key
    default:
    default: Vagrant insecure key detected. Vagrant will automatically replace
    default: this with a newly generated keypair for better security.
    default:
    default: Inserting generated public key within guest...
    default: Removing insecure key from the guest if it's present...
    default: Key inserted! Disconnecting and reconnecting using new SSH key...
==> default: Machine booted and ready!
==> default: Checking for guest additions in VM...
    default: No guest additions were detected on the base box for this VM! Guest
    default: additions are required for forwarded ports, shared folders, host only
    default: networking, and more. If SSH fails on this machine, please install
    default: the guest additions and repackage the box to continue.
    default:
    default: This is not an error message; everything may continue to work properly,
    default: in which case you may ignore this message.
==> default: Rsyncing folder: /Users/ken/vagrant_machines/centos7_lamp/ => /vagrant
Vagrantに関するその他の操作は以前までの記事を参考にしてください。


